MAKING 2 - 1/700scale Multi-Material Kit : Battleship YAMATO
"1/700scale Multi-Material Kit : 日本海軍 戦艦 大和"の製作メイキングをUPしていきます。
組み立て説明書の順番で進んでいきますので、組む際の参考にしてください。
第二回目ですが、前回は工具の紹介でしたから、今回が組み立て初回です。まずは船体に舷外電路を貼っていくところからです。
After the introduction to the required tools, starting from this update, we will follow the instruction manual to build the "1/700scale Multi-Material Kit : Battleship YAMATO".
This article will start to assemble the circuit line outside the hull.
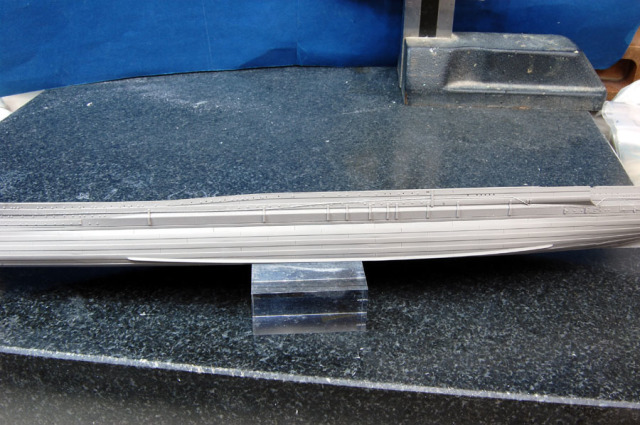 舷外電路ですが、これは磁場に感応して爆発する磁気機雷に対抗するために設置されたもので、船体の磁場を打ち消す効果がありました。
The circuit outside the hull is for cancelling the magnetic field generating from the battleship, defending from the attack of the magnetic underwater mine.
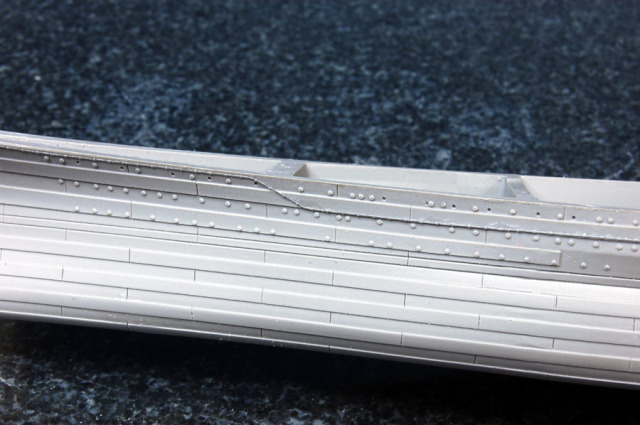 この舷外電路はエッチングパーツになっています。組み立ては、船体に瞬間接着剤で接着していきます。
しっかりと位置決めをし曲面になじませたら、ゼリー状の瞬間接着剤を点付けして接着していきます。前回説明した通り、ゼリー状瞬着は流し込みタイプに比べて硬化するまでわずかながら時間がありますので、少しは位置を調整することができます。位置が決まったら、最後に流し込みタイプで接着し、隙間なく船体になじませます。
The circuit is photo etch parts. Use the instant adhesives to attach to the hull.
Because of the curved shape of the hull, it is suggested to use the jelly type instant adhesives since the drying time of jelly type can stay longer for you to have minor adjustment to the position of the circuit.Use the liquid type for finializing the position. The circuit will stick firmly with no spaces left.
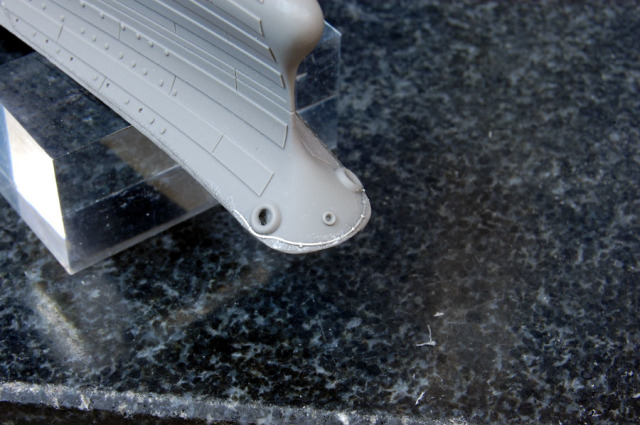
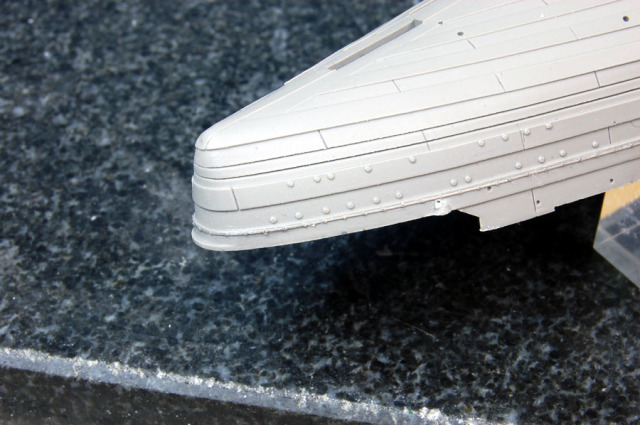
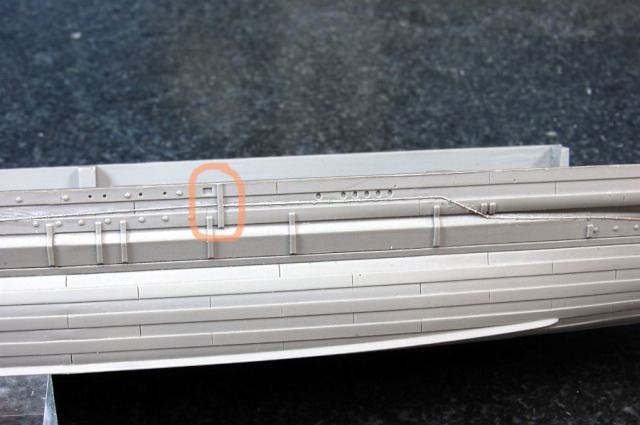 本来、船首から船尾までつながっている舷外電路ですが、模型上の見栄えとして、写真の丸印の突起のある部分はあえてエッチングをカットして接着する方法もあります。こうすることによって隙間なく船体になじませることができます。必須の工作ではないですが、ひとつの見せ方の方法としてご紹介しました。
Although the circuit should be linked around the hull, you may cut the photo etch parts (as shown in the red circle marked in the photo) for better looking to the model. This can make you leaving no spaces and gaps in between the circuit and the hull.It is not the only way to attach the circuit, you may do it in your way and treat this as your reference.
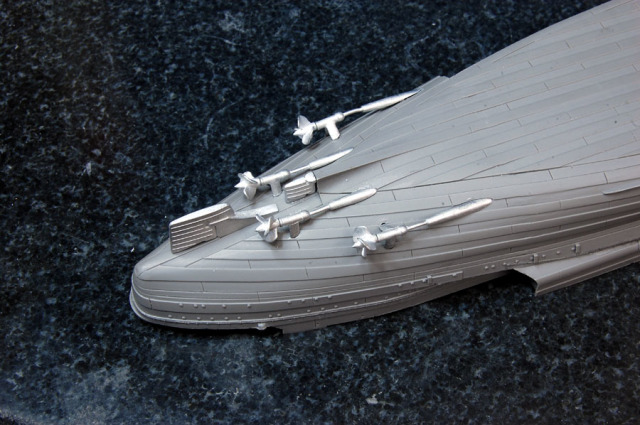 スクリュー関係は特に難しいところはないですが、歪みがあると目立つところですので、そのあたりはチェックしつつ組んでいきます。
次回に続きます。
Attaching the screws (propeller) are not so difficult. However, please check them carefully to keep them parallel to the hull. It is too obvious if you attach them even a little bit tilted.
To be continued. . .
組み立て説明書の順番で進んでいきますので、組む際の参考にしてください。
第二回目ですが、前回は工具の紹介でしたから、今回が組み立て初回です。まずは船体に舷外電路を貼っていくところからです。
After the introduction to the required tools, starting from this update, we will follow the instruction manual to build the "1/700scale Multi-Material Kit : Battleship YAMATO".
This article will start to assemble the circuit line outside the hull.
 舷外電路ですが、これは磁場に感応して爆発する磁気機雷に対抗するために設置されたもので、船体の磁場を打ち消す効果がありました。
The circuit outside the hull is for cancelling the magnetic field generating from the battleship, defending from the attack of the magnetic underwater mine.
 この舷外電路はエッチングパーツになっています。組み立ては、船体に瞬間接着剤で接着していきます。
しっかりと位置決めをし曲面になじませたら、ゼリー状の瞬間接着剤を点付けして接着していきます。前回説明した通り、ゼリー状瞬着は流し込みタイプに比べて硬化するまでわずかながら時間がありますので、少しは位置を調整することができます。位置が決まったら、最後に流し込みタイプで接着し、隙間なく船体になじませます。
The circuit is photo etch parts. Use the instant adhesives to attach to the hull.
Because of the curved shape of the hull, it is suggested to use the jelly type instant adhesives since the drying time of jelly type can stay longer for you to have minor adjustment to the position of the circuit.Use the liquid type for finializing the position. The circuit will stick firmly with no spaces left.


 本来、船首から船尾までつながっている舷外電路ですが、模型上の見栄えとして、写真の丸印の突起のある部分はあえてエッチングをカットして接着する方法もあります。こうすることによって隙間なく船体になじませることができます。必須の工作ではないですが、ひとつの見せ方の方法としてご紹介しました。
Although the circuit should be linked around the hull, you may cut the photo etch parts (as shown in the red circle marked in the photo) for better looking to the model. This can make you leaving no spaces and gaps in between the circuit and the hull.It is not the only way to attach the circuit, you may do it in your way and treat this as your reference.
 スクリュー関係は特に難しいところはないですが、歪みがあると目立つところですので、そのあたりはチェックしつつ組んでいきます。
次回に続きます。
Attaching the screws (propeller) are not so difficult. However, please check them carefully to keep them parallel to the hull. It is too obvious if you attach them even a little bit tilted.
To be continued. . .
MAKING
|


